How to setup IIS Dynamic IP Restrictions
- Login to your Windows server as administrator.
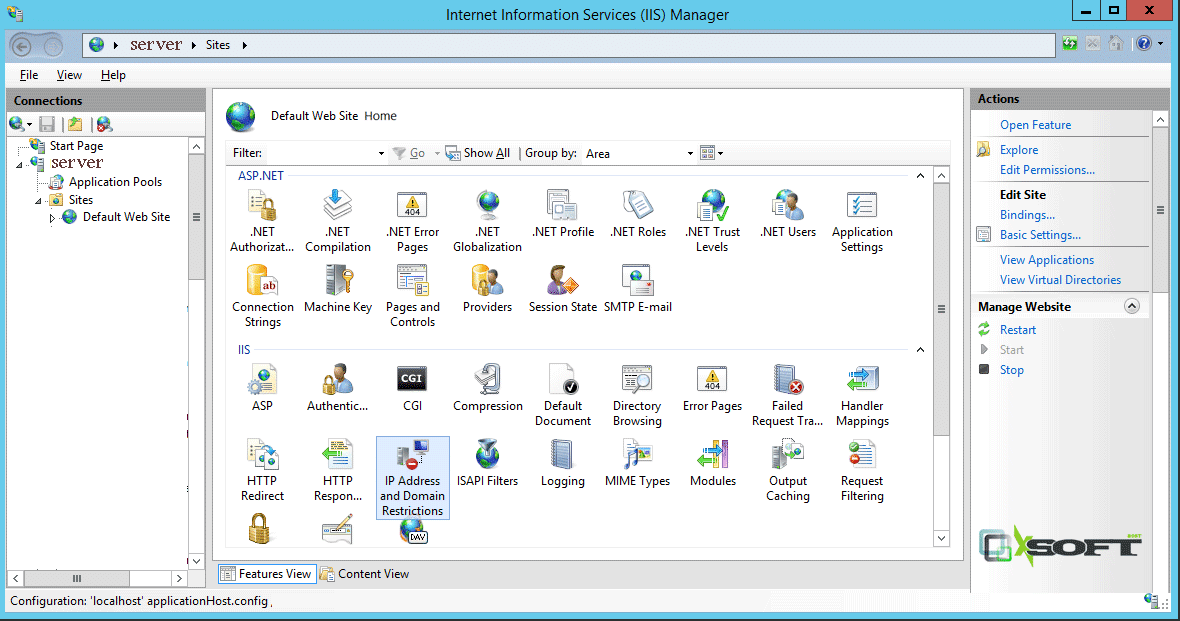
- Open IIS Manager.
- Select your website within IIS Manager and click IP address and Domain Restrictions Icon.
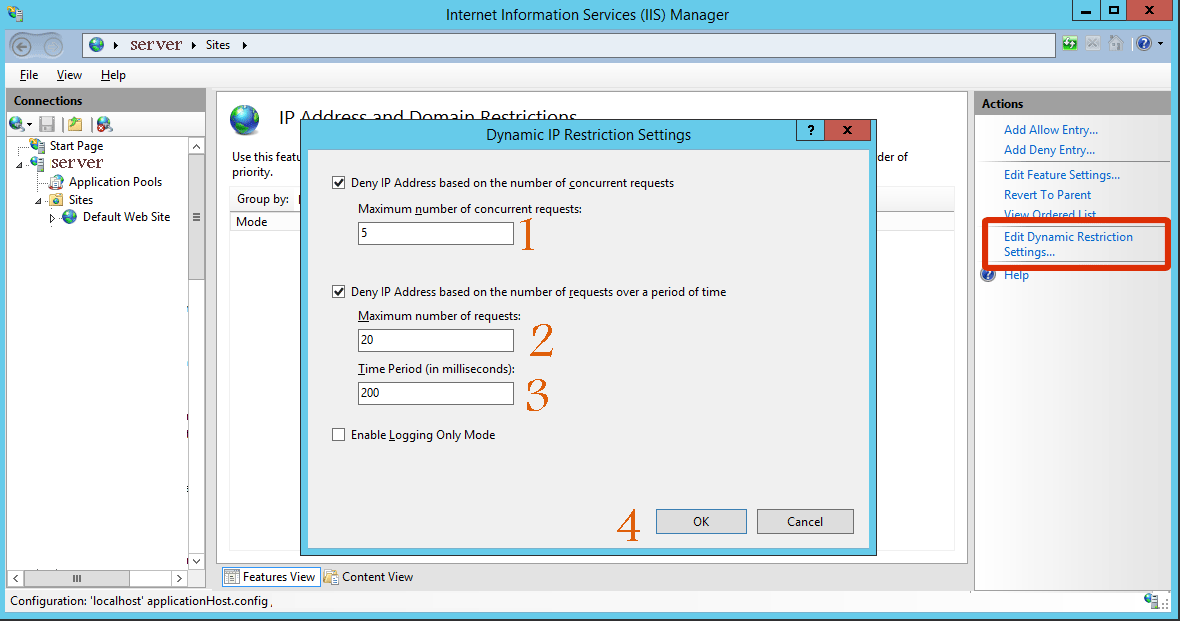
- On the left Pane click Edit Dynamic Restriction settings link button.
- When the Dynamic IP Restriction Settings dialog box appears :
- Deny IP Address based on the number of concurrent requests : check this option if you want to prevent an HTTP client with the same IP address from establishing too many simultaneous connections usually this done by none human actions.
- Deny IP Address based on the number of requests over a period of time : Enable this option if you want to prevent an HTTP client from establishing too many connections within a specific time period:
- Maximum Number of requests:Enter the maximum allowed HTTP client request.
- Time period (in Milliseconds):Define time value in milliseconds ,when the client reach the maximum requests within the time period the IIS Module will prevent the client from accessing HTTP .
How to set the Behavior for IIS when Denying IP Addresses
- Login to your Windows server as administrator.
- Open IIS Manager.
- Select your website within IIS Manager and click IP address and Domain Restrictions Icon.
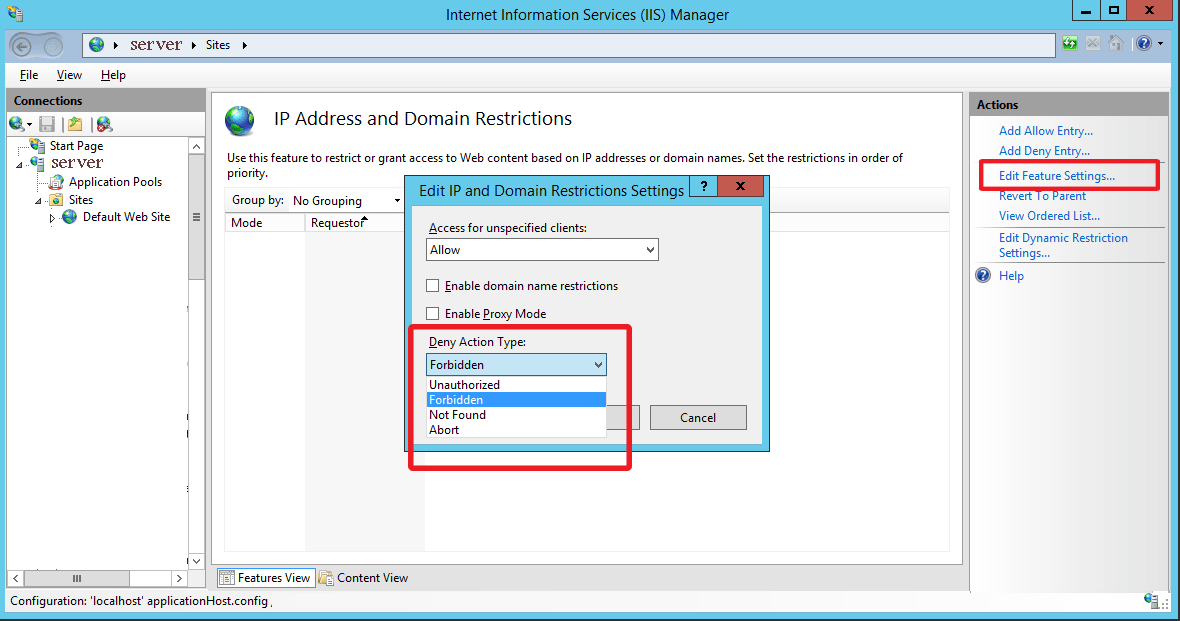
- Click Edit Feature Settings link.
- From the Deny Action Type drop-down menu and choose the behavior that IIS uses from the following values:
- Unauthorized: IIS will return an HTTP 401 response error code.
- Forbidden: IIS returns an HTTP 403 response error code.
- Not Found: IIS returns an HTTP 404 response error code..
- Abort: IIS will terminate the current HTTP connection.
- Click Ok button.
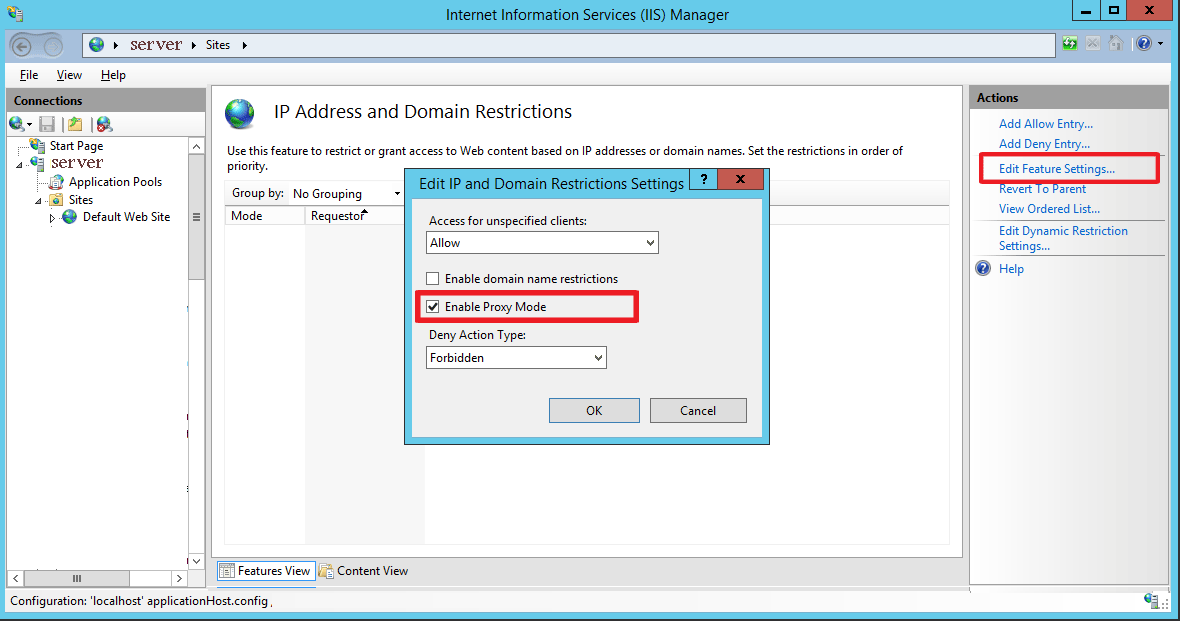
Enable IIS Dynamic IP Restrictions Proxy Mode
This feature available on IIS 8 . Proxy Mode allow administrators to configure their server to examine the x-forwarded-for HTTP header in addition to the client IP address in order to determine which requests to block.This is great feature in-case clients may access IIS through one or more firewalls, load-balancing, or proxy servers.
- Login to your Windows server as administrator.
- Open IIS Manager.
- Select your website within IIS Manager and click IP address and Domain Restrictions Icon.
- Click Edit Feature Settings link.
- From the Edit IP and Domain Restriction Settings dialog box ,Chick Enable Proxy Mode Checkbox.
- Click Ok button.